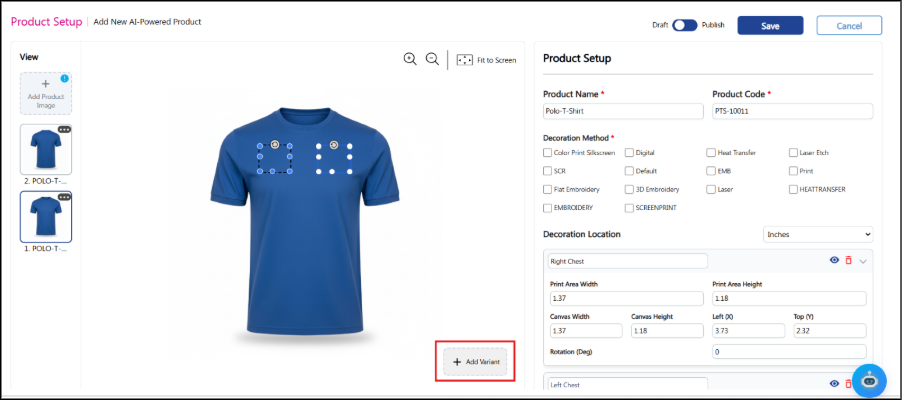
- Click on + Add Variant
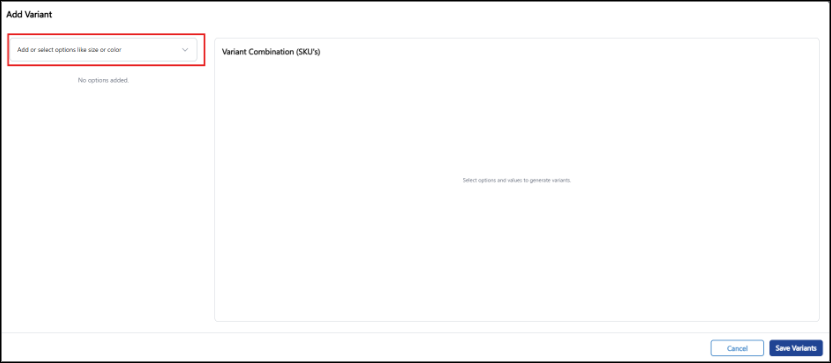
- A popup will appear.

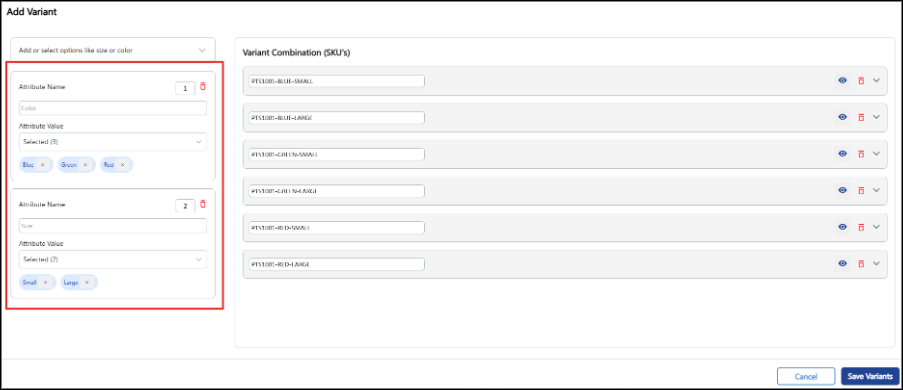
- Add the Attribute and its values: Click on the dropdown in the left panel.
- Add the Attribute Name. Example: Colors, Size (Select the attribute if it is already created or create a new attribute).
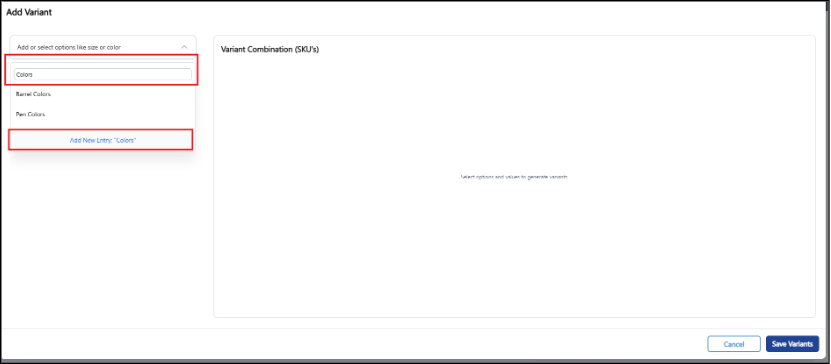
- Click on Add New Entry. A popup will appear.
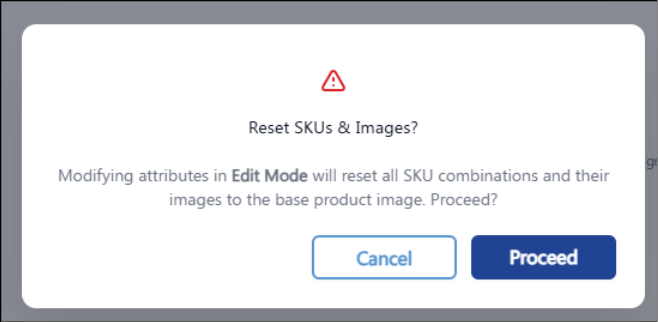
- Click on the Proceed button and the Attribute will be added. Similarly, add the required attributes.
- Add the Attribute Value. Example – Blue, Red, Green etc.
- Select the Attribute Value dropdown. Enter the value, e.g. Blue. Click on the button to Add New Entry.
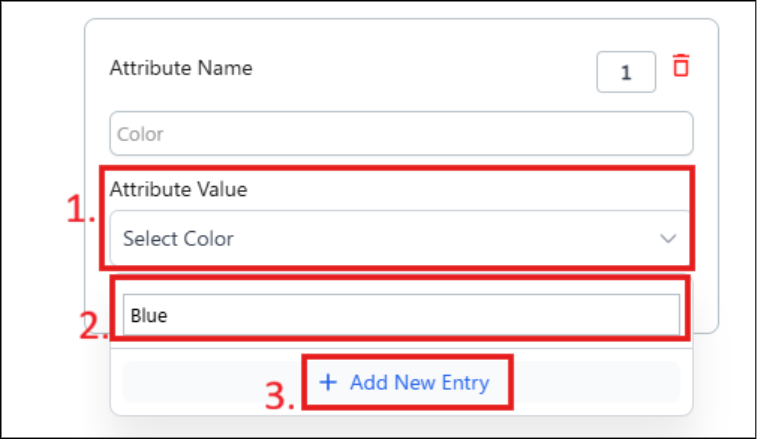
- Similarly, keep on adding the required Attribute Values.
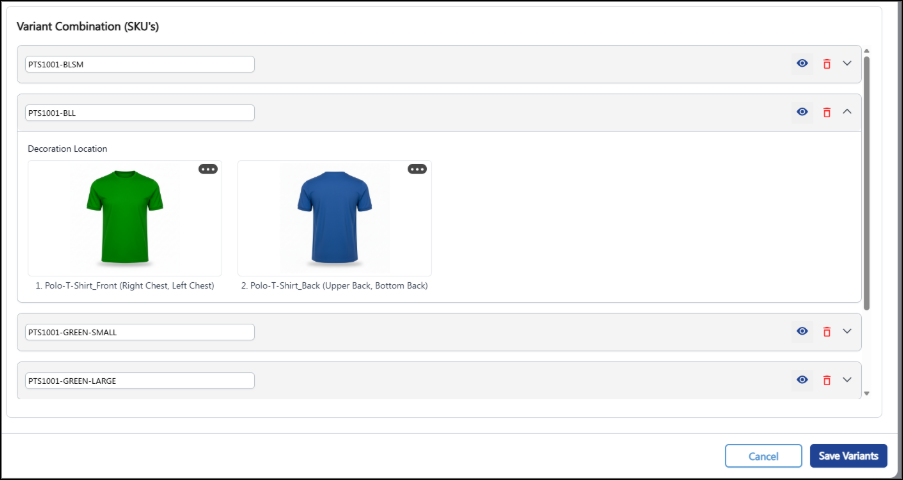
- In this example, Color and Size Attributes are configured and Auto-Generated SKUs will be shown.
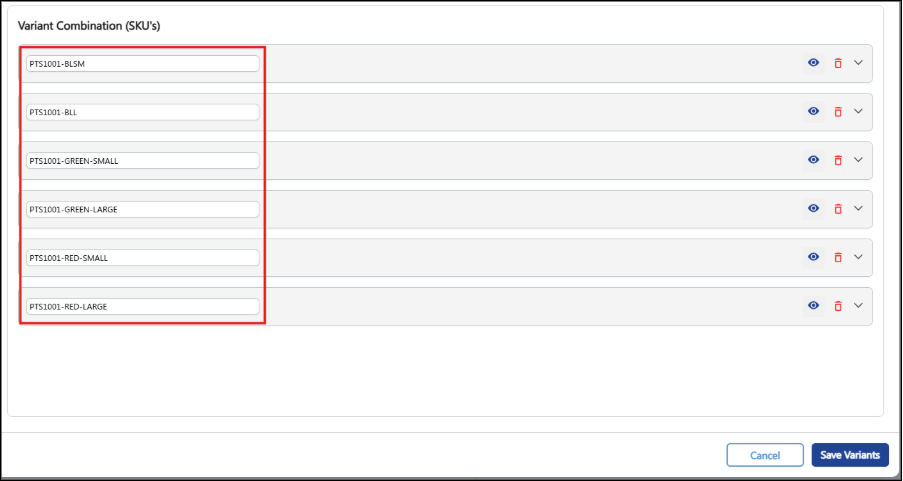
- Update the SKUs to match it with the Ecommerce product SKUs. It should match the same. To update the SKU’s, click on the individual rows
- After updating the SKUs, update the images of each variant. Click on the empty space to expand the accordion.
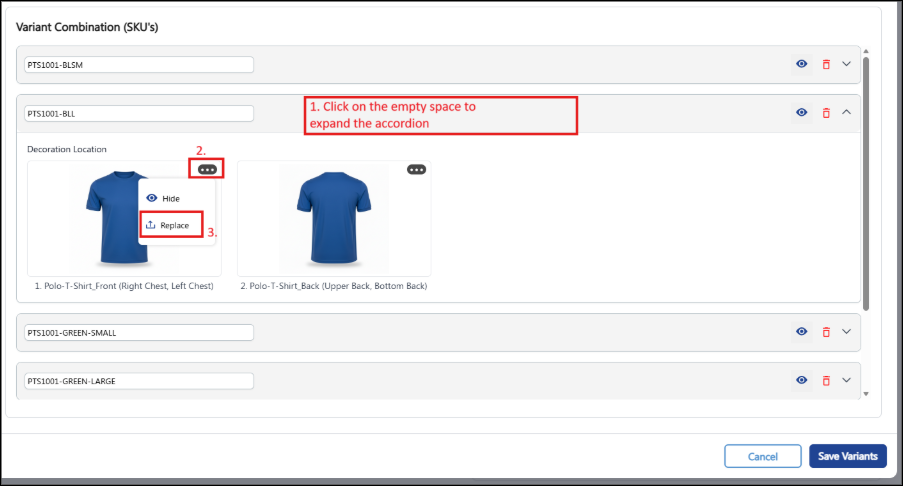
- Click on the 3 dots and click the Replace icon. A popup will appear to upload the images.
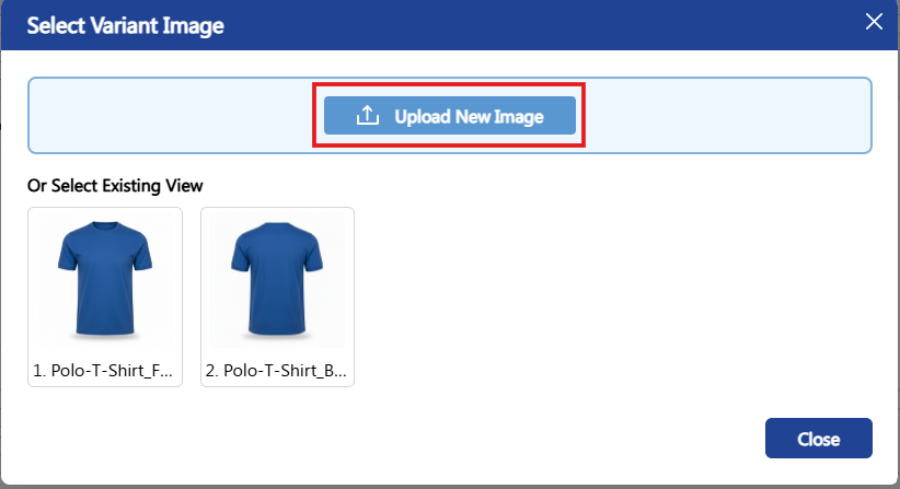
- Click on the Upload New Image button and give a path of the system folder where the images are kept.
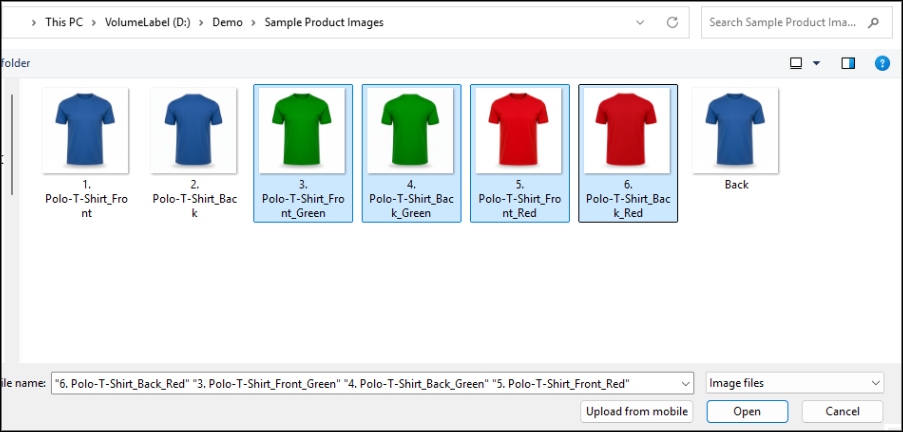
- Select the required images and click on Open button. The selected images will be uploaded.
- Replace the back image as well by clicking on the 3 dots.
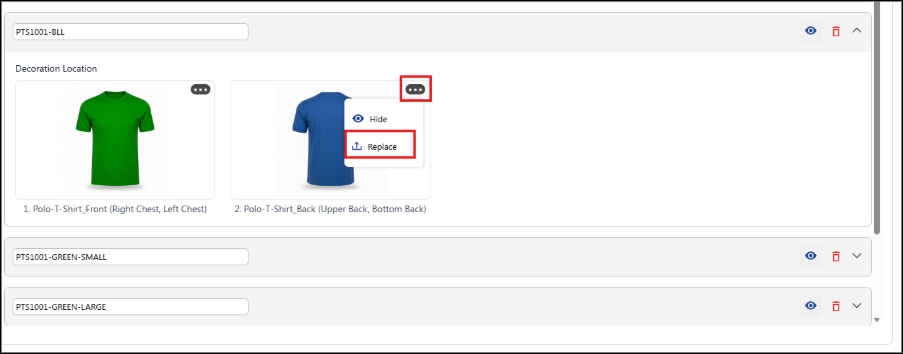
- Click on the Replace icon. Poup will appear to select the images. Select the Back view image.

- Similarly, add all the variant images by expanding the accordions.