BigCommerce Support Document
This document explains the step-by-step installation of the Artifi app into BigCommerce. It also includes post-installation steps to configure the necessary details for integrating Artifi with BigCommerce. Please follow the sequence of actions in the order provided to gain a clear understanding of the Artifi setup within BigCommerce.
Connector App Installation
Follow the below steps to install the Artifi connector from the the marketplace
Login to existing BigCommerce account.
Users will be logged into BigCommerce and redirected to the Marketplace page from menu Apps >> Marketplace
Search for Artifi in the Marketplace.
Click on Get This App.
Install with Existing or New BigCommerce website.
Users will click on the "Install" button, to install the app.
Once the installation is completed, click on the "Confirm" button.
After clicking confirm, the dashboard page will be displayed.


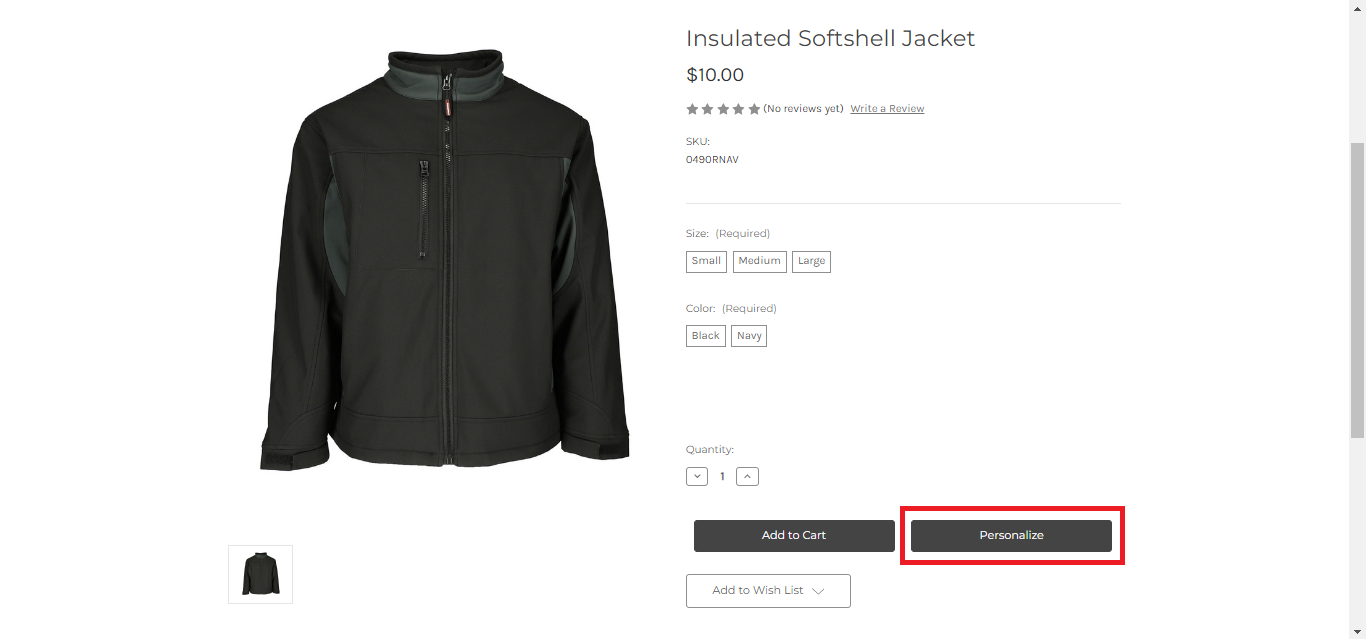
Click on the Design Configuration tab to add the name of the personalize button that will be displayed on the PDP page and Save the page.

BigCommerce should provide the Ecommerce website URL to Artifi, so that it can be whitelisted to allow BigCommerce to access Artifi..

Please reach out to Artifi at support@artifilabs.com for further configuration. There are two ways in which Artifi can be configured:
Iframe
Component
Following are the details BigCommerce will receive from Artifi to configure Artifi on BigCommerce website. The same configuration details will be applied to both iframe as well as component.
Application Configuration Details
Admin Credentials
A product should be created in Artifi admin, so that it can be mapped with a BigCommerce product. The Artifi team will help to create the product in Artifi.
After adding the configuration details and product in Artifi, click on the Manage Product tab in BigCommerce and set the product as personalized.
Note: The product set as personalized must be created in Artifi.
Following are the Actions explained that the BigCommerce user can set in admin.
Unset As Personalize - If the personalize button is already set on the front-end (webstore) then setting it to “Unset As Personalize” will remove the Personalize button from the front-end PDP page.
Set As Personalize -If the Set As Personalize option is selected by the user then the Personalize button would be included in the webstore PDP page.
Optional - This option would allow the users to use both the Personalize as well as the Add-to-cart options to be used simultaneously on the webstore PDP page.
Click on the Personalize button to start personalization.


Integrate React component
Reference Code for product-view.html
File Path: templates\components\products\product-view.html=>
Utility:
Script 1. To integrate the Artifi Component into Bigcommerce.
Script 2. To initialize the product page with product Id and customer details.


React Editor Component

React Upload Image, Text & Price Component

Edit mode
Reference Code for content.html
File Path: templates\components\cart\content.html=>
Utility:
This code is useful to carry out following activities simultaneously which are listed below:
Once the product is added into the cart the associated decoration gets carried along with the product into the PLP (which is the Add-to-cart page).
Here the facility to edit the previously added decoration is presented along with the provision to preview the decorated product image.

Reference Code for subscription-form.html
File Path: components\common\subscription-form.html=>
Utility:
This is for storing customer details.

Reference Code for product.html
File Path:templates\pages\product.html=>

Illustration for the Product SKU-Product Code Match
The user should also make sure that the Product SKU in Bigcommerce maps with the intended product SKU in Artifi.

Illustration for the Variant SKU-Variant Code Match
Also the variant SKU in Bigcommerce must map with the Product code present for the same product in Artifi variants, this needs to be ensured. If a product needs to have variants then in such a case one variant should be set as default.


Product List Page
Once the product is set up on BigCommerce then we can see the product on the list page.

Product Display Page
Clicking the product on the PLP page will redirect you to the display page, where you can view the product along with its defined components and attributes.

Cart Details

Artifi Data in Bigcommerce Admin
Once the shopper is done with the Add-To-Cart then the Bigcommerce Administrator may fetch the Artifi details from the Bigcommerce Admin >> Order Section.
In the Order Section, following useful information will be displayed as shown in the below snippet.
Artifi Design ID
Artifi PDF URL
Artifi XML URL

Note : Artifi Design ID is the key to get the personalization details (like Add to Cart Json, XML etc) of the respective Product.